Chickpea Sandwiches
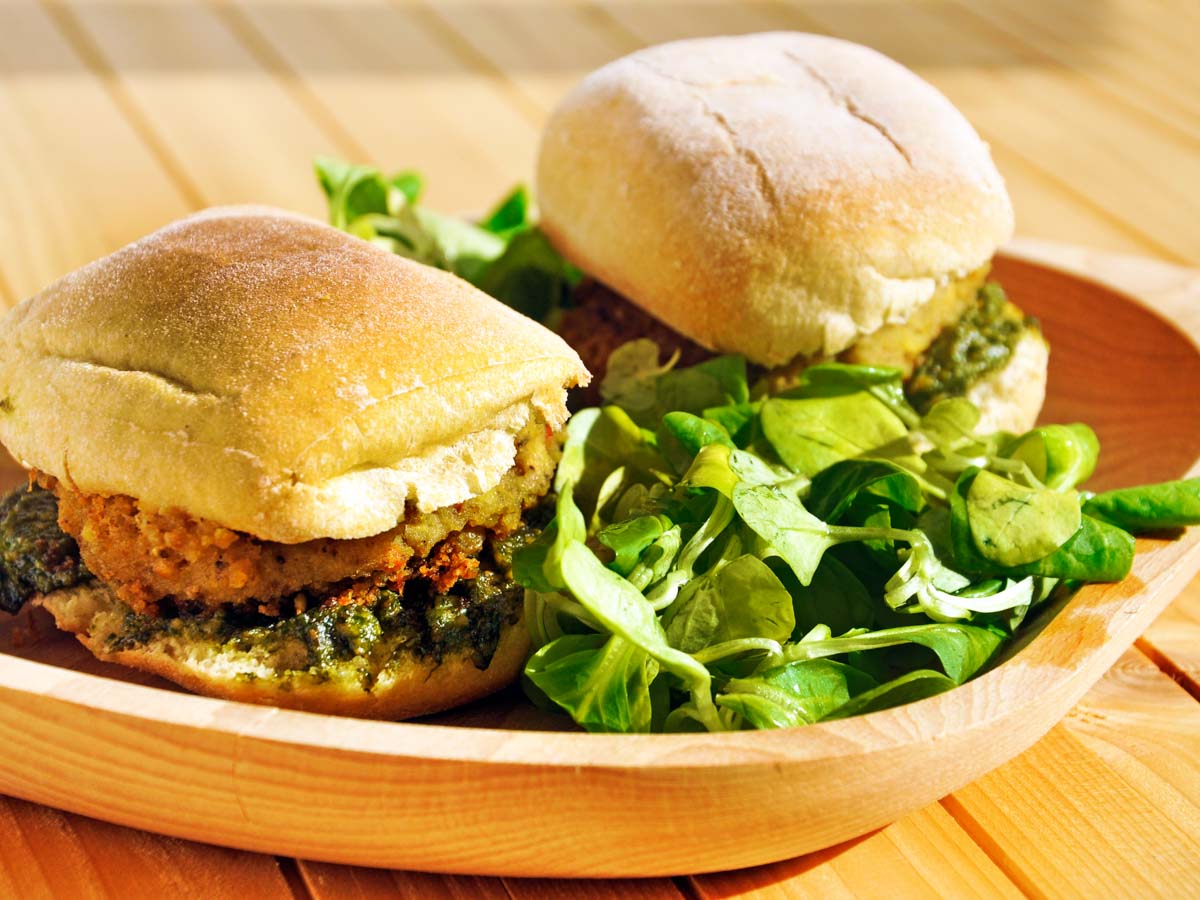
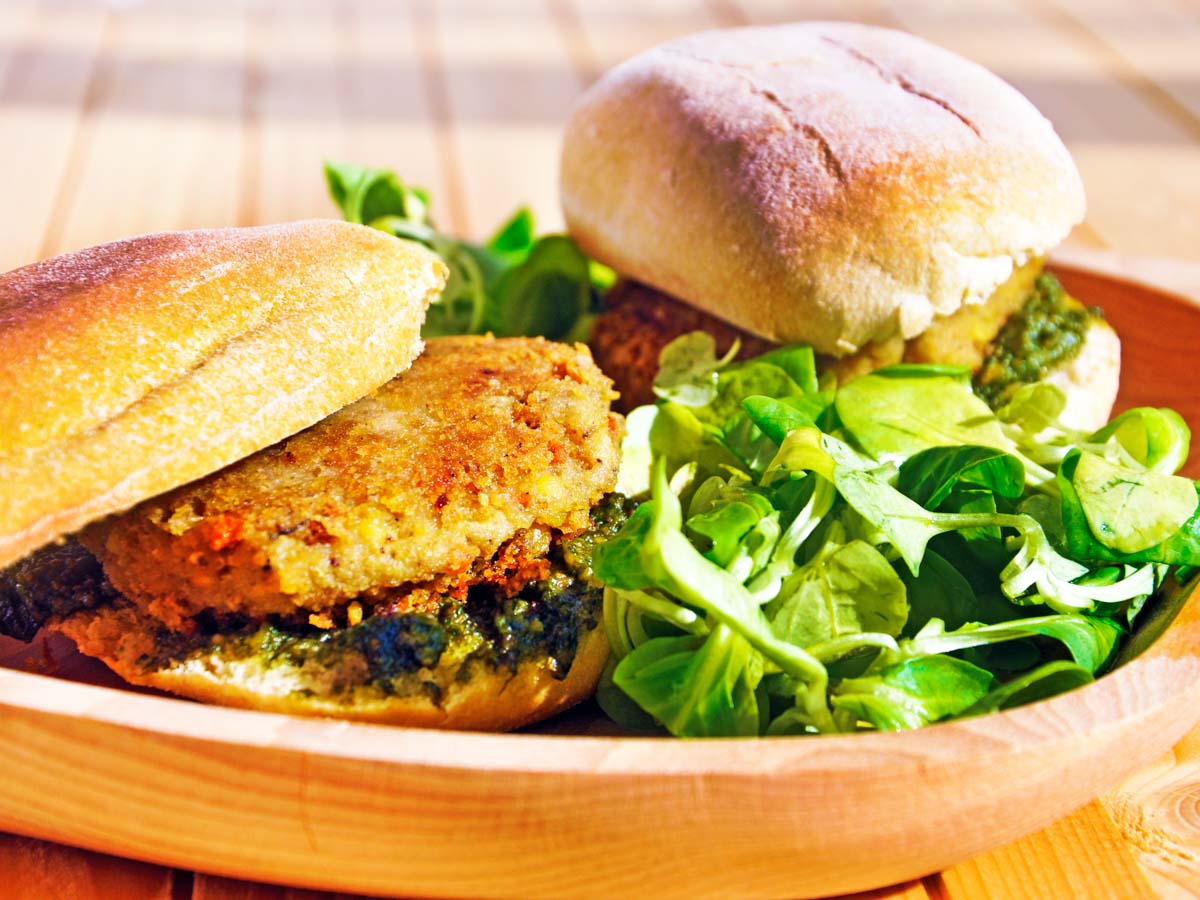
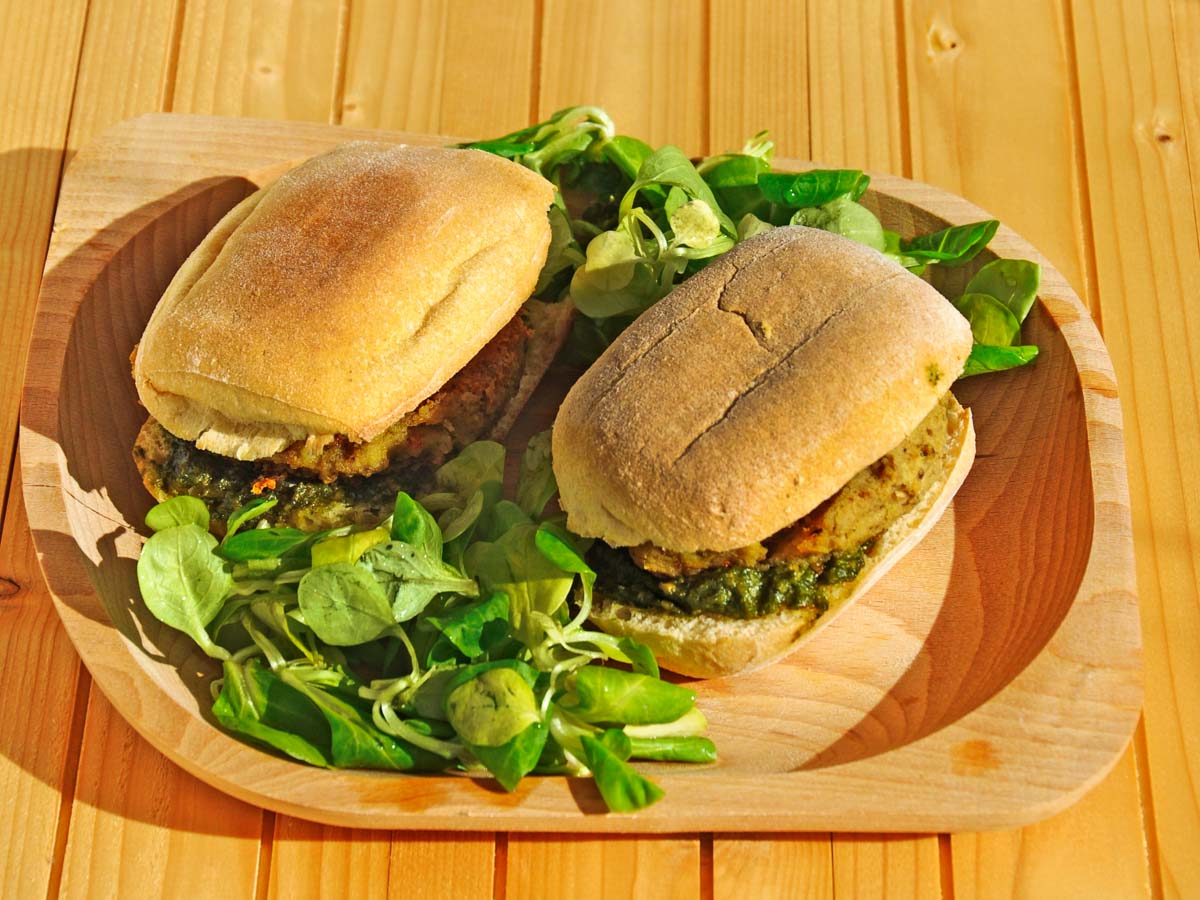
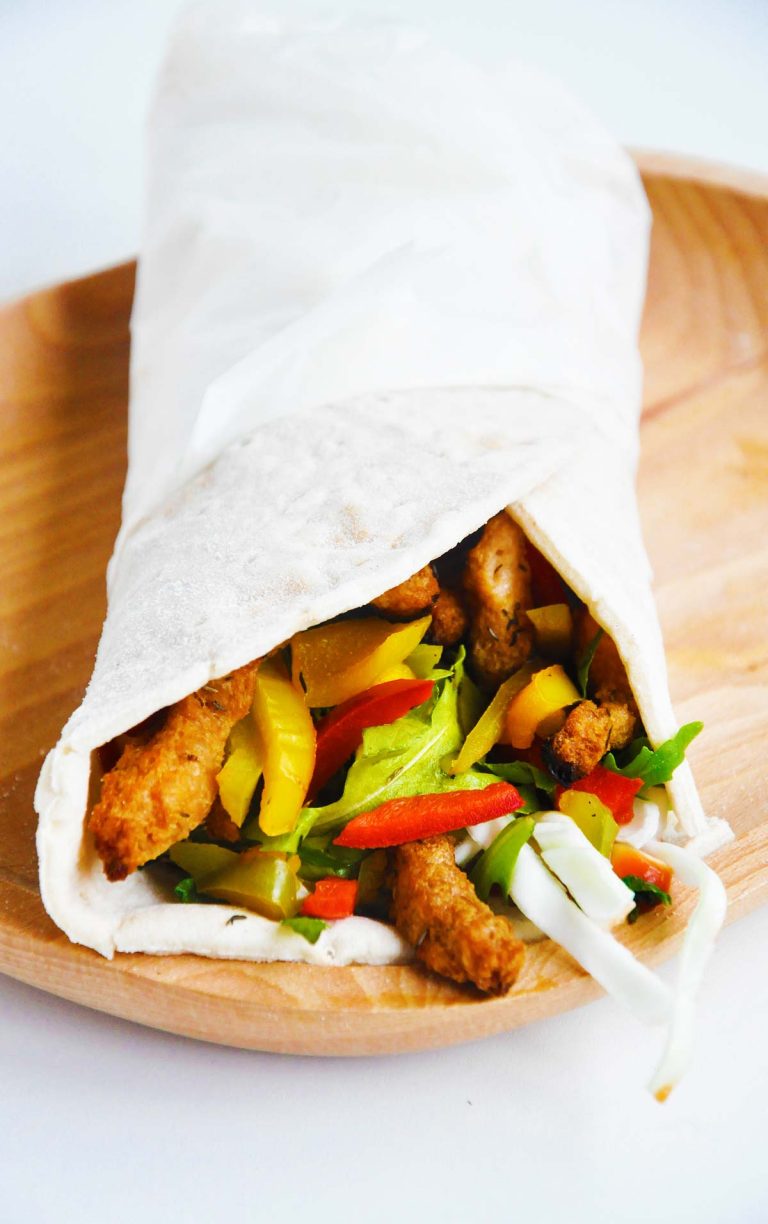
These vegan chickpea sandwiches layer a crispy, herby chickpea patty with basil pesto, pickles and fresh greens on toasted gluten-free ciabatta. They come together fast, travel well, and make a satisfying lunch for school or work when you want something hot and hearty without any meat or dairy.
I am so happy to see that more and more gluten-free products appear each day in the stores here in Romania, too. Even though I have a gluten-free diet, I avoid processed foods as much as possible, so you won’t see me eating bread, sweets or snacks too often. But I must admit, I do crave a hot, steamy, gluten-free sandwich every once in a while! I had the opportunity to test these new products myself and I loved them, so I decided to turn these gluten-free Ciabatta bread rolls into chickpea sandwiches.
I made some really crispy and flavorful chickpea patties to go with these. Because my basil plant wasn’t feeling very well, I turned it into pesto! I followed this kind of vegan cooking spirit and made my own pesto with cashews and a little nutritional yeast, then spread it all over these Ciabatta bread rolls.
What goes into these chickpea sandwiches
The patties start with one 400g can of chickpeas, drained, blended with fresh parsley, a chopped onion, thyme, ground coriander and a little cumin. What holds them together is the combination of chickpea flour and psyllium husks (or ground flax seeds): the flour adds structure and the psyllium absorbs moisture and binds, so the mixture holds its shape in the pan without any egg. A tablespoon or two of dry vegetable mix adds savory depth, and I like to choose one that’s low in sodium and as natural as possible.
For the sandwich itself you’ll need gluten-free ciabattine (I used Schar, but any bread you like works), vegan pesto, a sliced pickle, a few thin onion slices, and some greens. I used valerian leaves, but any leafy green you have on hand is fine here.
How to get crispy patties every time
Blend the patty ingredients until smooth, then shape into patties and coat each one lightly in a little extra flour before it hits the pan. That flour coating is the trick for a crisp, golden crust: it dries the surface so it browns instead of steaming. Fry in hot oil for about two minutes per side, and resist the urge to flip too early. Wait until the underside is deeply golden and releases easily, which is your cue that a proper crust has formed.
A short bake finishes the assembled sandwich, warming the bread and melding the pesto and patty together. If you like a firmer patty, let the blended mixture rest a few minutes before shaping so the psyllium can fully hydrate and set. If your mixture feels too wet to shape, stir in a little more chickpea flour a spoonful at a time.
Make-ahead and storage
Here’s my favorite time-saver: the chickpea patty mixture makes far more than two large patties (about six or more), so I keep the extra composition in a small covered pot in the fridge. Every time I want some, I just take it out, shape the patties and fry them fresh. I usually do this a couple of times a week, because I eat a lot of patties! Making the mixture in larger batches this way saves lots of time.
If you love this kind of chickpea cooking, you’ll find plenty more to try. These sandwiches are close cousins of my chickpea patties and my green chickpea patties with tahini, and they belong right alongside my mini falafel bites in the make-ahead-and-fry-later rotation. For more inspiration, browse all my recipes with chickpeas.
What to serve with chickpea sandwiches
These are hearty enough to stand on their own, but they’re even better as part of a little spread. Serve them with a crisp side like my chickpea salad for a double dose of protein, or with some vegan snacks if you’re packing a lunchbox. A handful of extra greens or a few more pickles on the side rounds things out nicely.
If you make these crispy chickpea sandwiches, I’d love to hear how your patties turned out and whether you went with pesto or a different spread. Please rate the recipe and leave a comment below with your favorite greens or any tweaks you made!
Summarise & Save This Recipe
★ Add us as a trusted Google source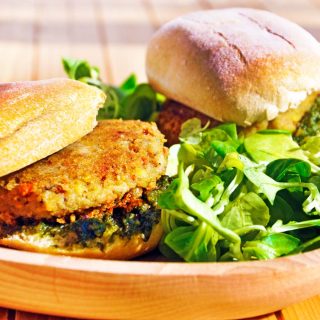
Green Chickpea Sandwiches
Ingredients
- 2 gluten-free ciabattine cut in half; I used Schar Ciabattine, but you can use any other type of bread
- 2 Tbsp vegan pesto homemade or store-bought
- 1 pickle sliced
- greens of choice I used valerian leaves
Chickpea patties:
- 1 can chickpeas I used a 400g can, drained
- ½ cup parsley chopped
- ½ cup chickpea flour or any other kind of flour, plus some more for coating
- 1 onion chopped; keep 2-4 thin onion slices aside for the sandwiches
- 2 Tbsp dry vegetable mix any brand, preferably low in sodium and as natural as possible; mine has celery, carrot and parsnips among other ingredients
- 2 Tbsp psyllium husks or ground flax seeds
- ½ tsp thyme
- 2 tsp ground coriander
- ½ tsp ground cumin
- oil for frying
Instructions
- Make the chickpea patty mixture: add all the chickpea patty ingredients to a food processor and blend until smooth.
- Heat some oil in a large non-stick frying pan.
- Shape the mixture into patties and coat them in a little flour, then place them in the pan.
- Fry for about 2 minutes on each side, until golden and crispy.
- Cut each ciabattine in half. Spread some pesto on the bottom half, then add 1-2 onion slices and 1-2 pickle slices. Add a chickpea patty and top with the other half of bread.
- Bake in the oven for 10 minutes.
- Serve with valerian leaves or any other greens you like. You can also tuck the greens into the sandwich.
Notes
Frequently Asked Questions
Yes. Every component is plant-based: the patties are made from chickpeas, chickpea flour, psyllium husks and herbs with no egg, and the sandwich uses vegan pesto plus fresh greens and pickles. There is no dairy, egg or honey anywhere in the recipe.
The binder here is chickpea flour combined with psyllium husks (or ground flax seeds). The flour gives structure while the psyllium absorbs moisture and holds everything together, so the patties keep their shape in the pan without any egg. Letting the blended mixture rest a few minutes before shaping helps it firm up.
Coat each shaped patty lightly in a little extra flour before frying, which dries the surface so it browns rather than steams. Fry in hot oil for about two minutes per side, and wait to flip until the underside is deeply golden and releases easily from the pan.
Yes, and I recommend it. The blended composition makes more than two large patties (about six or more), so store the extra in a small covered pot in the fridge. Shape and fry fresh patties whenever you want them, which saves a lot of time during the week.
I used Schar gluten-free ciabattine, but any bread you like will work, gluten-free or not. For greens, I used valerian leaves, though any leafy green you have on hand is a good fit. Fresh pickles and a couple of thin onion slices round out the fillings.
A short 10-minute bake warms the bread and melds the pesto and patty together for a hot, cohesive sandwich. If you prefer, you can skip the oven and eat the patty straight from the pan on the toasted bread, though the baked version has that steamy, just-made quality.
Okaaay these patties are crazy good. I made them last week for the first time and I was unsure about the taste, as it was the first time that I cook with Psyllium husks. I didn’t even know what I was missing on! Now I have a batch of patties at any given moment in my fridge. So, so good!
Thank you! So happy to hear this! 😀
I just tried making these sans food processor. I didn’t have rice flour but I had arrowroot flour I used instead, along with flax meal. I tried various methods of mashing the chickpeas, first with a pastry cutter (the chickpeas went right through the tines), a fork (too difficult) and a potato masher (too difficult, I could not even push one masher’s worth of chickpeas through it!) Ended up just mashing them as best I could with my hands. I got most of them mashed but there were still whole chickpeas in my patties!
They were awesomely crispy on the outside, but the innards were mushy & didn’t look completely cooked. Is that the way they’re supposed to be? Not enough flour perhaps? They hold together very well, no crumbling. And they were dark golden brown so I don’t think I could have fried them any longer. I’ve never made any patties like this before so I don’t know if I am just used to fish patties or what. Although after they sat on a paper-towel-lined plate the insides did seem to firm up and weren’t so mushy after all.
I’ll definitely be making these again! Yours look awesome!
Hi, Tanya! Glad you liked them but sorry it was such a pain in the a** to make them! :)) Yes, having a food processor makes everything a lot easier. You could use a blender as well. A vertical hand-held one would be bet for these. They;re actually pretty cheap, and you don’t ‘need it to be that powerful. The inside is softer, but cooked. If it was uncooked, it means the heat was too high. So it got crispy on the outside but it didn’t have time to cook the inside properly. Try it on low-medium heat next time. Also, as you noticed, they firm up after a couple of minutes.
Yeah I tried making your quinoa ones last night & tried using my roommate’s blender, its just a small one, not hand-held, and the mix just wouldn’t mix up:(
Also I find I’m using an awful lot of oil – I am going macrobiotic due to cancer & I’ve read in many macrobiotic books that for cancer I need to try to minimize oils & fats.. even cooling them on a paper-lined plate still leaves much oil in them – if I were to bake veggie patties what temperature & time do you recommend?
Hi, Tanya! That’s the problem with blenders. If they’re not powerful enough it’s a real pain in the ass to use them for anything other than smoothies. And even if they’re powerful, you have to stop and mix the composition and then blend again. You can definitely bake these patties. 30 mins in the oven at around 180C(375F) is enough. I would suggest to at least slightly grease them with some oil so they don’t turn too dry. Hope this helps!