Chocolate Magic Custard Cake
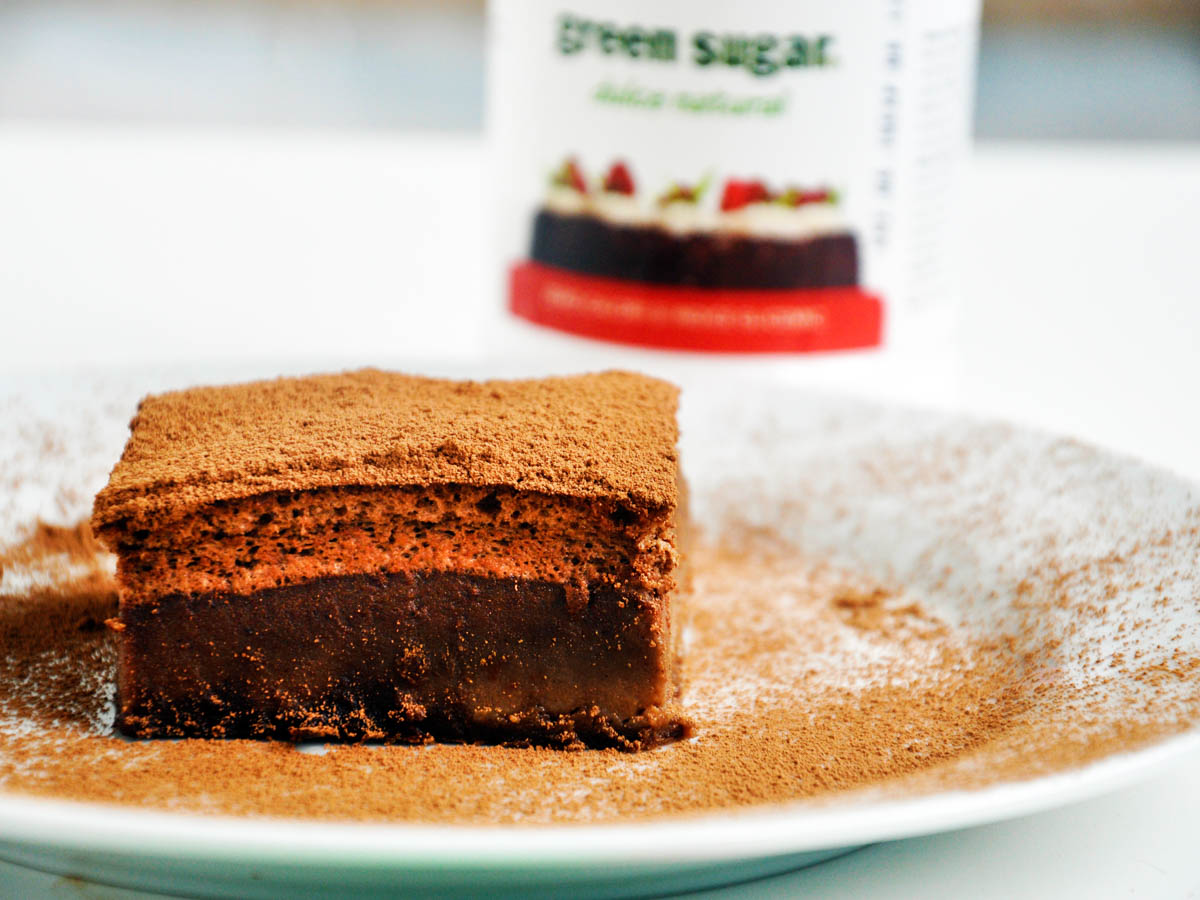
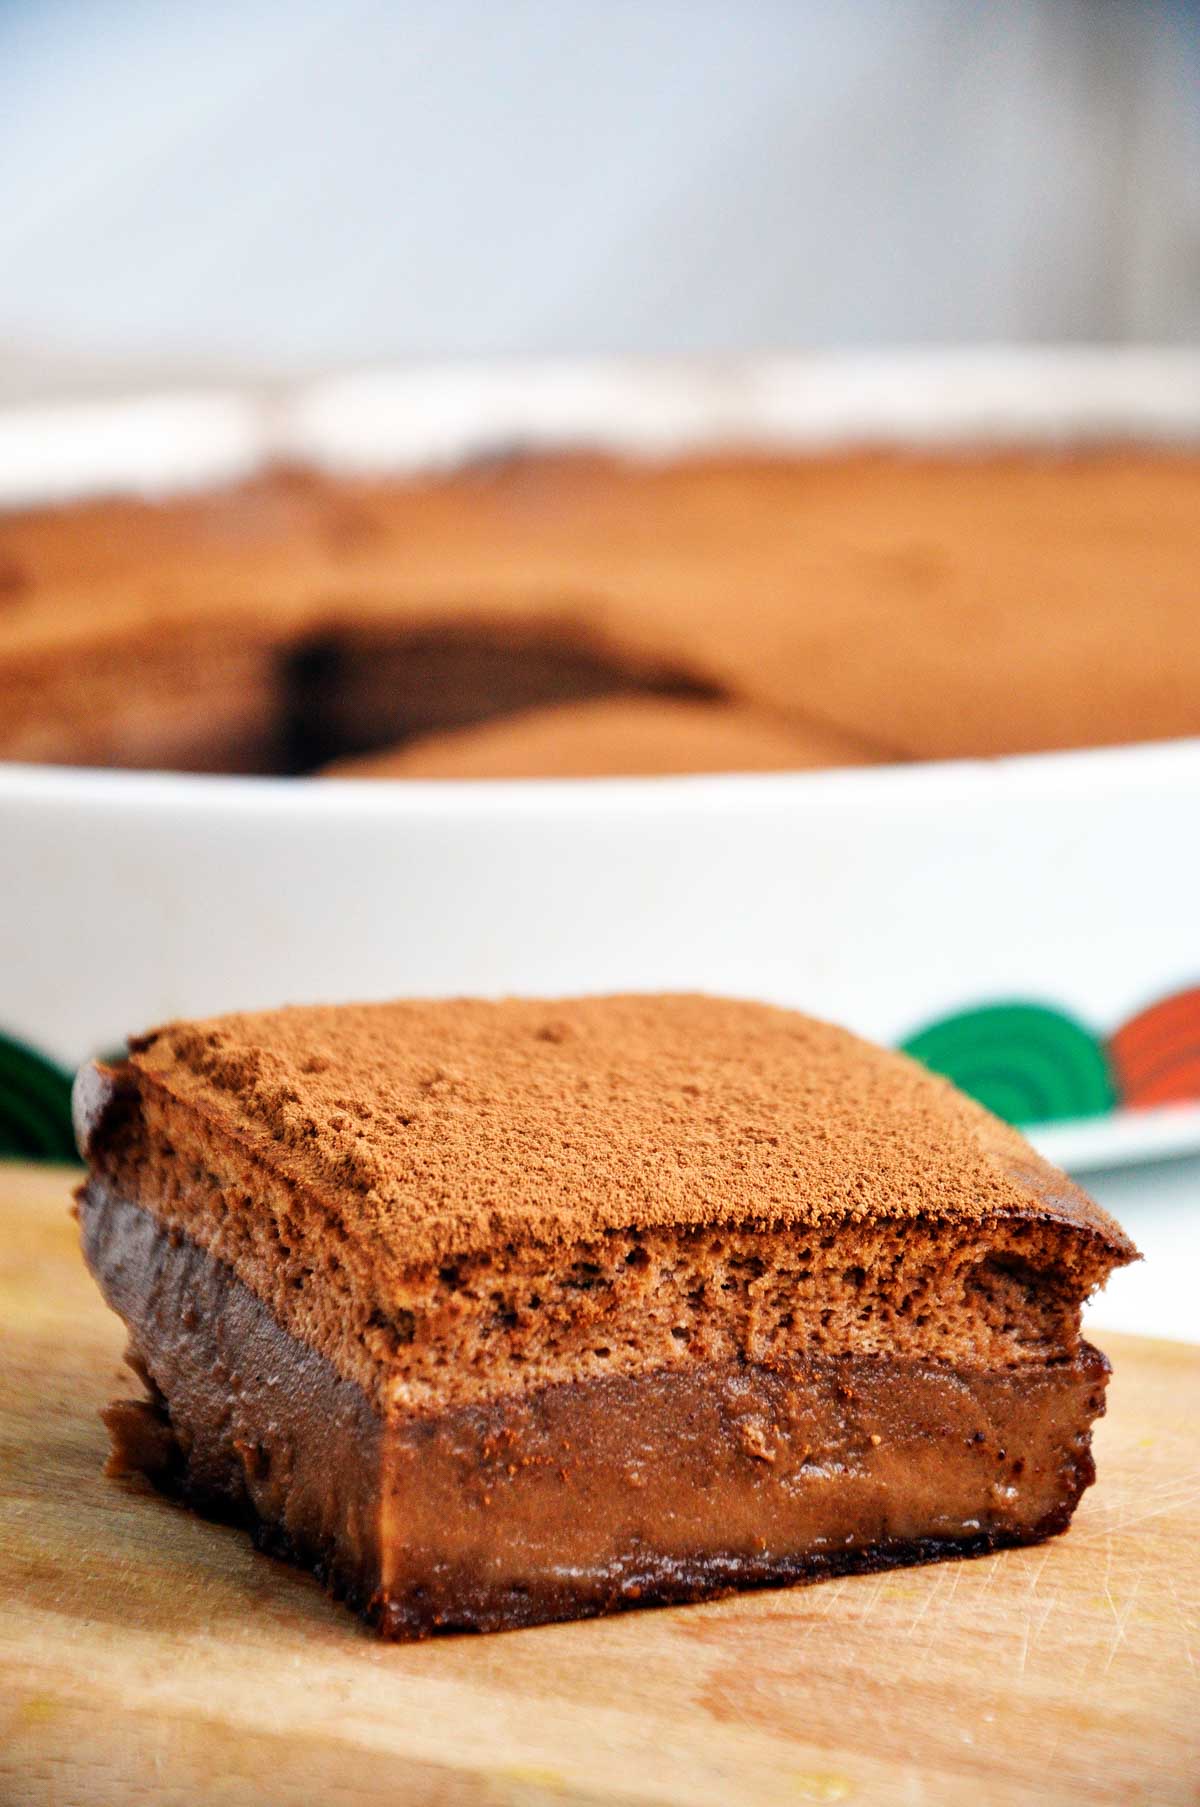
This chocolate magic custard cake is one batter that bakes into three distinct layers on its own: a dense fudgy base, a silky custard middle, and a light sponge on top. It is rich, deeply chocolatey, and far easier than it looks, which is exactly why it earned its Romanian nickname, “the smart cake” (prajitura desteapta). This version is gluten-free, dairy-free, and refined-sugar-free, so you get all the decadence without the usual heaviness.
First of all, I want to say a big THANK YOU to Jo from JoCooks! I found this decadent chocolate magic cake recipe on her blog and decided to give it a try. This is a Romanian recipe, usually known as “The Smart Cake.” I had heard about it a long time ago but never tried it myself, and I was intrigued by its name, so I decided to make it in a gluten-free, refined sugar-free, dairy-free version. I didn’t have the courage to make it egg-free, and therefore vegan, on the first attempt, but I will experiment and try it with aquafaba one day. Anyway, I loved the result! I used Jo’s recipe as inspiration and adapted it from there.
How one batter turns into three layers
The “magic” is not a trick, it is physics. You pour in a single thin, almost liquid batter, and during baking it separates by density. The heavier flour and cocoa sink to form a fudgy bottom layer, the egg-yolk-and-milk mixture sets into a custard in the middle, and the whipped egg whites rise to the surface and bake into an airy sponge on top. That is why the batter looks alarmingly runny when you pour it. Trust it. The thinness is what lets the layers settle out instead of blending into one uniform cake.
A note on the ingredients
A few of these ingredients do real work, so it helps to know why they are there. The eggs are the heart of the recipe and get separated: the yolks build the custard, the whites build the sponge. Use them at room temperature so the whites whip up to full volume. For sweetness I used stevia powder instead of sugar. Ever since I discovered Green Sugar Romania’s products, I ditched sugar and started using stevia powder instead. In my opinion, it is the best stevia powder on the market, and it is not sweeter either; I find it exactly as sweet as sugar. You can use the same amount of regular sugar if you prefer.
Coconut oil replaces butter to keep things dairy-free, and warm soy milk stands in for dairy milk; either swap works in reverse if you don’t need it dairy-free. The gluten-free flour (I used MixIt by Schar) keeps the base tender, but plain all-purpose flour works fine if gluten isn’t a concern. The apple cider vinegar goes into the egg whites to help stabilize them, and a tablespoon of rum plus vanilla rounds out the chocolate so it tastes deep rather than flat.
Tips for getting the layers right
- Whip the whites to stiff peaks. They should hold their shape when you lift the beater. Soft, droopy whites won’t give you a proper top sponge layer.
- Fold, don’t stir. When you combine the whites with the chocolate mixture, add a little at a time and fold gently. You want to keep the air in. Folding both directions, a bit of whites into the batter and then a bit of batter into the whites, brings them together without deflating everything.
- Don’t panic about the runny batter. It is supposed to be almost liquid. That thinness is exactly what lets the three layers form.
- Watch your oven, not just the clock. The cake is done when the top is set and springs back lightly, usually 50 to 60 minutes, but baking time varies oven to oven.
The one step you can’t skip: cooling
This is the most important part, so I’ll say it loudly: let the cake cool completely before you cut it. The layers only separate and firm up as it cools. If you slice into it warm, it will still be jiggly and won’t have the proper texture, and you’ll be disappointed for no reason. I know the wait is hard with something this chocolatey sitting on the counter, but it is worth it. A few hours, or even overnight in the fridge, gives you the cleanest layers.
Storing and making it ahead
Because the custard middle is essentially set egg and milk, keep this cake in the fridge in an airtight container, where it holds well for up to four days. It actually slices more neatly cold, so making it a day ahead is a smart move for guests. If you fall in love with the format, the same magic-cake principle works with other flavors; I will definitely make this one again and try it with new flavors too. In the meantime, if you want more gluten-free options, my gluten-free cocoa sponge cake and gluten-free vanilla cake are good places to start, and for a lighter no-bake chocolate fix there is always my easy chocolate mousse.

More chocolate desserts to try next
If this cake scratches your chocolate itch, you are in good company here. For something raw and decadent, try my creamiest raw chocolate truffles, and when you want a full roundup of options, browse my collection of the 10 most decadent chocolate desserts. A slice of this magic cake also pairs beautifully with one of these healthy coffee drinks for an afternoon treat.
If you make this chocolate magic custard cake, I would love to know whether your three layers separated cleanly. Please rate the recipe and leave a comment below telling me how it turned out, and if you experimented with a different flavor or made it egg-free with aquafaba before I did, share it so we can all learn from it!
Summarise & Save This Recipe
★ Add us as a trusted Google source
Chocolate Magic Custard Cake
Ingredients
- 6 eggs at room temperature and separated
- 1 ½ tbsp water
- 250 g stevia powder or the same amount of sugar
- 200 g coconut oil melted
- 100 g gluten-free flour I used MixIt by Schar, but you can also use all-purpose flour if you don’t need to make this gluten-free
- 9 tbsp cocoa powder
- 750 ml soy milk warm (or dairy milk, if you don’t want to make this recipe dairy-free)
- 1 pinch salt
- 2 tsp vanilla powder
- 1 tbsp rum
- 1 ½ tsp apple cider vinegar
Instructions
- Preheat the oven to 325 F / 190 C. Grease and flour a baking dish. Mine was oval-shaped (see photos), approx. 35 cm long and 25 cm wide.
- Separate the eggs and add the egg yolks to a bowl. Add the water and stevia powder (or sugar) to the egg yolks. Beat on high speed (using a hand mixer or stand mixer) for a couple of minutes.
- Add the melted coconut oil, vanilla, rum and salt to the mixer and continue beating until the oil is fully incorporated.
- Mix the cocoa and flour together in a bowl, then add to the mixing bowl in batches. Mix thoroughly.
- Add the milk a little at a time and mix. The batter will be almost liquid, but don’t worry.
- In a separate large bowl, add the egg whites and vinegar and mix until the egg whites are stiff.
- Add a bit of the egg whites to the cocoa mixture and gently fold in. Then reverse and add a bit of the chocolate mixture to the egg whites. Repeat until everything is well combined.
- Pour the batter into the baking dish and bake for 50-60 minutes, or until done. The baking time may vary depending on your oven.
- Very important! Let it cool completely before cutting. As it cools, the layers of this magic cake will separate. While hot, the cake will still be jiggly and won’t have the proper texture.
Notes
Frequently Asked Questions
It is called magic because a single thin batter bakes into three distinct layers without any extra effort. As it bakes, the batter separates by density into a fudgy bottom, a custard middle, and a light sponge top. In Romania it is known as the smart cake, or prajitura desteapta, for the same reason.
No, it is vegetarian, not vegan. It uses six eggs, which are essential to the structure: the yolks form the custard layer and the whipped whites form the sponge top. It is, however, dairy-free, gluten-free, and refined-sugar-free, using coconut oil, soy milk, and stevia powder.
A thin, almost liquid batter is exactly what you want here, so do not worry. The runniness is what allows the ingredients to separate by density during baking and form the three signature layers. A thicker batter would simply bake into one uniform cake.
The layers only separate and set as the cake cools. If you cut into it while it is still warm, it will be jiggly and will not have the proper custard texture. Letting it cool fully, or even chilling it in the fridge, gives you the cleanest, most defined layers.
Yes. The recipe is written gluten-free and dairy-free, but you can swap in all-purpose flour for the gluten-free flour and use dairy milk in place of the soy milk if you do not need those restrictions. The technique and layering stay exactly the same.
Because the middle is a set custard of egg and milk, store it in an airtight container in the fridge for up to four days. It actually slices more neatly when cold, which makes it a great make-ahead dessert for guests.

Hi could I omit the chocolate?As my daughter is allergic to cocoa.
Or substitute it for something else?
You can make this vanilla flavored and simply skip cocoa. 🙂
This cake is actually magic 🙂 Soooo smooth and the chocolate flavor is so decadent. Love love love!
Glad you liked it! 😀
Hi , thankyou for sharing your recipe . I am intrigued as to if you have tried it with aquafaba yet ? We are vegan , with many food intolerance’s such as nuts and gluten . I was just a little bit excited to find this and hope like made that aquafaba will do the trick for us 😉
Hi Jenjen! 😀 Glad you like it! I used aquafaba for a sponge cake before, but it was the first time I made this recipe so I didn’t want to take the risk. It was great for the sponge cake, so I think it should work for this too. I will test it. 🙂