
Vegan Tortilla Casserole
This vegan tortilla casserole layers seasoned soy chunks, corn chips, vegan cheese and fresh toppings into one baked dish that tastes like everything you love about Mexican cuisine, only meatless. Think of it as a Tex-Mex answer to lasagna: comforting, saucy, quick to assemble and endlessly adaptable to whatever you already have in the fridge. It comes together in under an hour and makes a satisfying weeknight dinner the whole table will reach for.
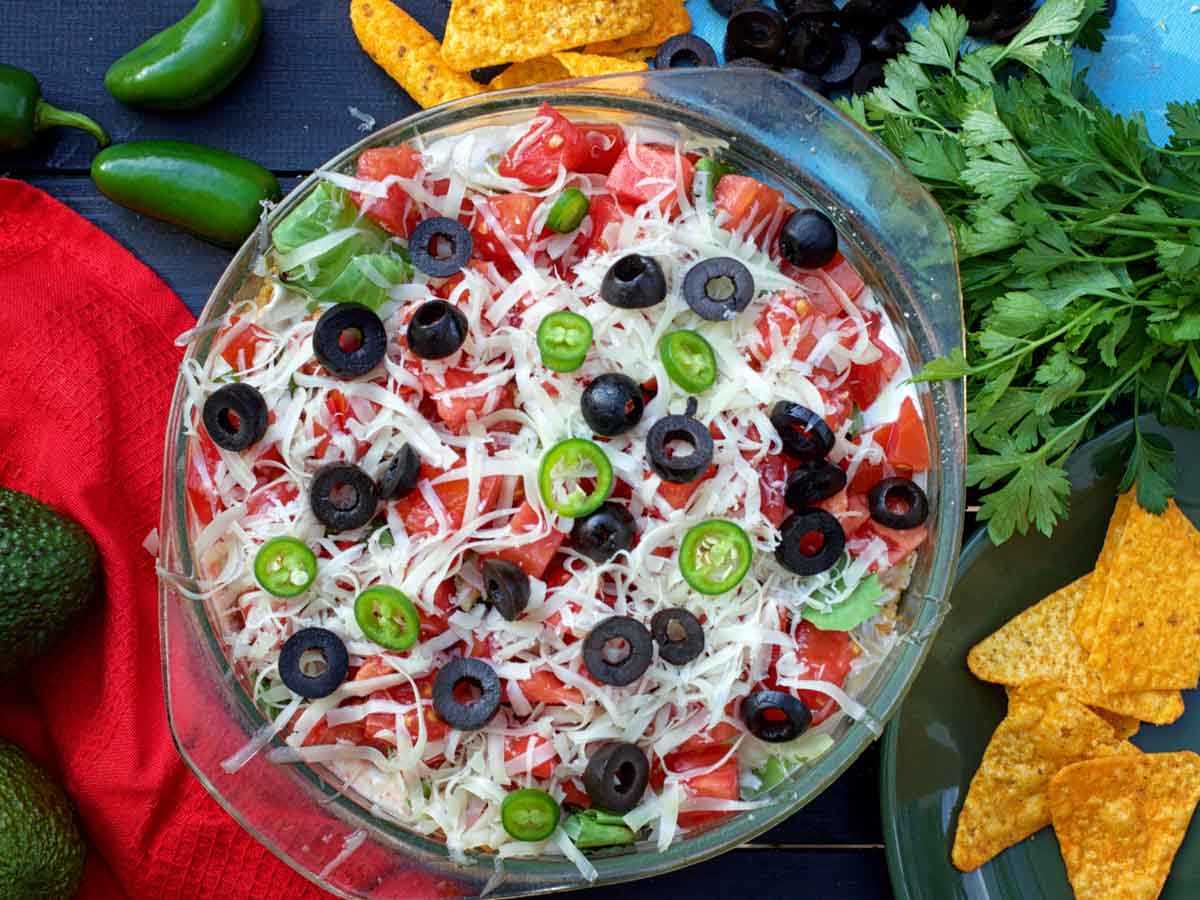
One of the things I love most about this tortilla casserole is its versatility, because you can make it with ingredients you already have on hand. For my version I used soy chunks to mimic minced beef, then added corn chips, lettuce, tomatoes, black olives, a few jalapeno slices and a generous dollop of vegan sour cream to top it all. I chose corn chips over corn tortillas for some extra texture while still keeping that Mexican authenticity, but you can use whichever you prefer. The results are one of the most comforting and delicious Mexican dishes, I promise you.
What is a tortilla casserole?
A tortilla casserole is a layered baked dish that works much like a lasagna, except tortillas or corn chips stand in for the pasta sheets. Between the layers you get a seasoned filling, cheese and a creamy element, all baked until warm and melty, then finished with fresh toppings. The traditional Tex-Mex version leans on minced meat, cheese and sometimes black beans and corn, so it is an easy dish to make fully plant-based. If you enjoy this style of baked, saucy comfort food, you will feel right at home with our vegan mushroom lasagna too.
The ingredients, and why they work
The star here is textured soy protein, which stands in for minced beef. Rehydrating the small chunks in a mix of hot water, hot soy milk and taco seasoning is the key step: the soy soaks up all that liquid along with the spices, so it turns tender and savory instead of dry or bland. Give it the full soaking time before it ever hits the pan.
Corn chips form the base layer and bring the crunch and that unmistakable corn-tortilla flavor. Vegan cheese melts through the filling and again on top, while vegan sour cream, chopped lettuce, tomatoes, sliced black olives and jalapenos add the fresh, cooling and spicy contrast that keeps every bite interesting. Onion, garlic and olive oil build the savory foundation, and the taco seasoning ties it all together with classic Mexican warmth. Fresh chili and black beans are natural additions if you want to lean further into the black bean and corn Tex-Mex direction.
How to get it right
The most important habit is patience during the soak. Let the soy chunks sit for the full 20 minutes so they fully hydrate; rush this and they stay chewy in the center. After you saute the onion, garlic and soy, turn the heat off and let the pan sit covered for a couple of minutes so the “meat” absorbs the flavors before baking.
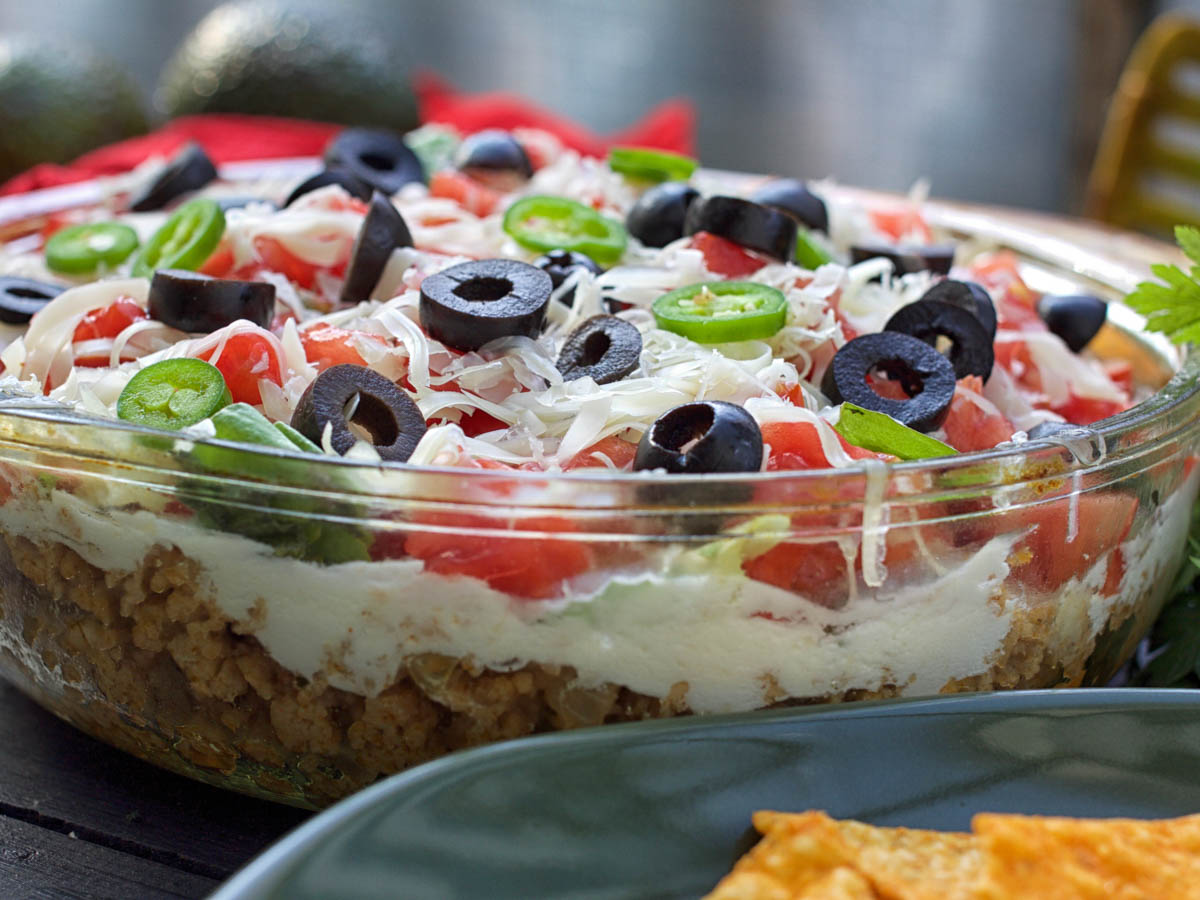
Keep the layering simple and even. Spread the soy filling first, then the corn chips and half the cheese, so the chips are cradled and stay crisp rather than turning to mush. Bake covered so the cheese melts without the top drying out; ten minutes at a hot oven is plenty. Then let the casserole cool for a few minutes before adding the sour cream and cold toppings, otherwise the lettuce wilts and the sour cream slides off. Add the fresh toppings only right before serving.
Easy swaps and variations
- Corn tortillas instead of chips: use six corn tortillas cut into strips for a softer, more traditional layered texture.
- Add beans and corn: stir in black beans and sweet corn with the soy for a heartier, more filling casserole.
- Turn up the heat: add fresh chopped chili peppers to the saute, or extra jalapenos on top.
- Use what you have: swap in any vegetables lingering in the fridge, such as bell peppers or mushrooms, sauteed alongside the onion.
- Different protein: cooked lentils or crumbled tofu work in place of the soy chunks.
What to serve with it
This casserole is a full meal on its own, but it plays nicely with the rest of a Mexican spread. Serve it alongside vegan quesadillas for a cozy sharing dinner, or wrap any leftovers into vegan burritos the next day. A simple green salad, guacamole and a squeeze of lime on the side round everything out and cut through the richness.
Storage and make-ahead
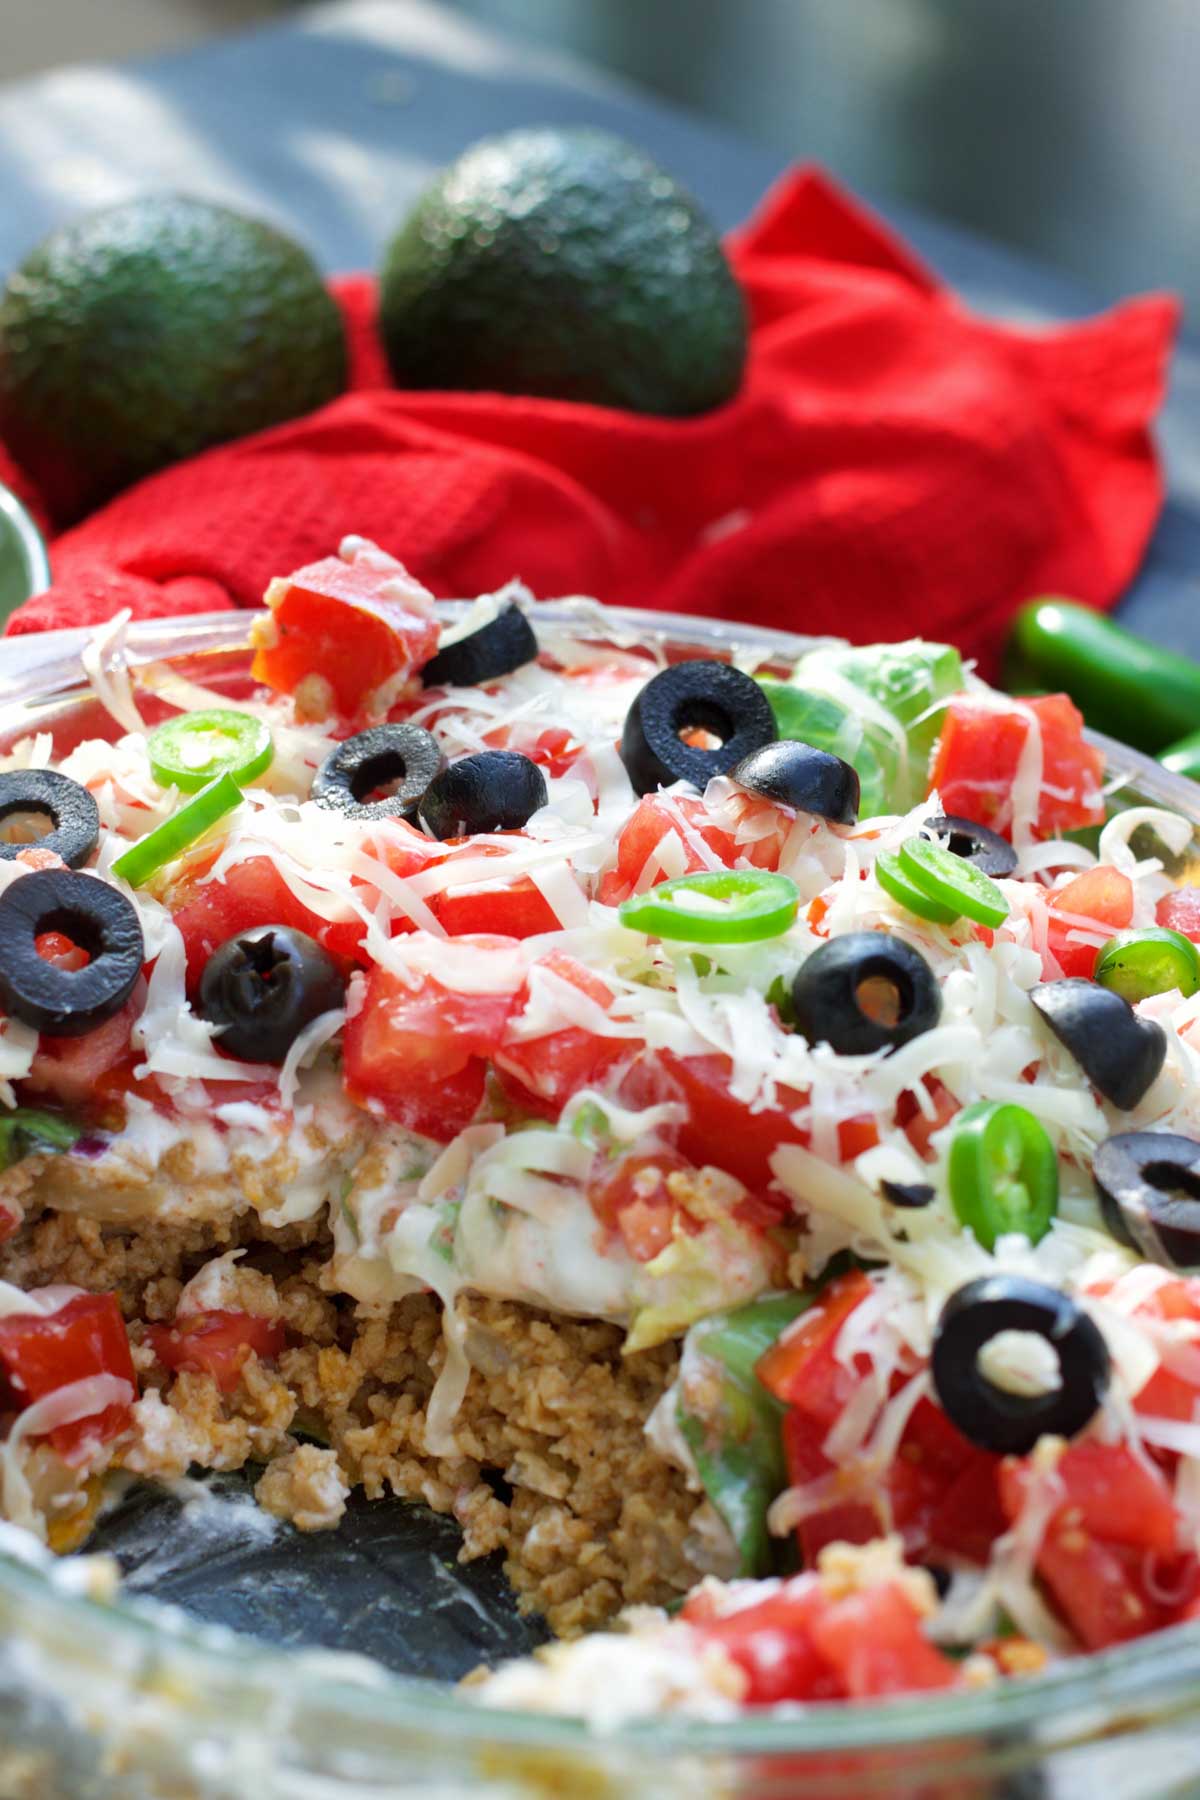
I recommend adding this vegan casserole to your meal prep plan, because the baked base freezes perfectly and you can reheat it over the following days. Assemble and bake the soy, chip and cheese layers, then cool completely before storing. Keep it in an airtight container in the fridge for up to three to four days, or freeze the baked base for up to two months.
The one rule for great leftovers: store the baked casserole and the fresh toppings separately. Reheat the base in the oven or microwave until piping hot, then add the sour cream, lettuce, tomato, olives and jalapenos fresh so they stay crisp and cool. That keeps every serving tasting as bright as the first.
If you make this vegan tortilla casserole, I would love to know how it turned out. Leave a star rating below and drop a comment telling me whether you went with corn chips or tortillas, and what you piled on top.
Vegan Tortilla Casserole
Ingredients
For the “ground beef”
- 1 cup textured soy protein small chunks
- ½ cup water hot
- ½ cup soy milk hot
- 2 Tbsp taco seasoning
- 1 onion finely chopped
- 2 cloves garlic crushed
- 2 Tbsp olive oil
For the layers:
- 6 corn tortillas or 1 cup corn chips
- ¾ cup soy sour cream vegan
- 2 cups lettuce chopped
- 2 tomatoes chopped
- 1 cup vegan cheese shredded
- ¼ cup black olives sliced
- 1 Tbsp jalapenos sliced
Instructions
- In a medium bowl, add the soy chunks and the taco seasoning and stir to combine. Pour in the hot water and the hot soy milk, stir again, then let it sit for about 20 minutes, until the chunks are soft.
- Preheat the oven to 200 C.
- Heat a skillet over medium heat and add the olive oil. Add the chopped onion and the crushed garlic and saute for about 4 minutes. Add the soaked soy chunks, stir to combine and saute for 1 more minute. Turn the heat off, cover and let it sit for about 2 minutes, so the soy ‘meat’ can absorb the flavors.
- Transfer the soy mixture to a casserole dish, then spread the corn tortillas (or corn chips) and ½ cup of the vegan cheese on top.
- Cover and bake for about 10 minutes.
- Let it cool for a few minutes, then spread the vegan sour cream on top.
- Top with the chopped lettuce, the chopped tomatoes, the remaining vegan cheese, the olives and the jalapenos.
Notes
Frequently Asked Questions
Yes, it is fully vegan. It uses textured soy protein instead of minced beef, soy milk, vegan sour cream and shredded vegan cheese, with no eggs, dairy or other animal products. Just double-check that your taco seasoning and store-bought vegan cheese are certified plant-based.
Absolutely. The recipe works with either six corn tortillas or about a cup of corn chips. Chips give you extra crunch, while tortillas cut into strips give a softer, more traditional layered texture, so use whichever you prefer.
Place the soy chunks in a bowl with the taco seasoning, then pour over the hot water and hot soy milk and stir. Let them sit for about 20 minutes so they fully absorb the liquid and spices. This step is what makes them tender and savory rather than dry.
Yes, the baked base freezes very well, which makes it great for meal prep. Bake the soy, chip and cheese layers, cool completely, then refrigerate for three to four days or freeze for up to two months. Always add the sour cream and fresh toppings after reheating, not before.
It is a full meal on its own, but it pairs beautifully with vegan quesadillas, a green salad, guacamole and a squeeze of lime. Any leftover filling also makes a great base for burritos the next day.
For more heat, add fresh chopped chili peppers to the saute or extra jalapenos on top. To make it heartier, stir black beans and sweet corn into the soy filling, which pushes the dish toward a classic Tex-Mex direction.





Simple, delicious and absolutely perfect for meal prep! 🙂
Indeed! Happy you liked it!